If a product fails, a clear set of photographs can make or break your claim. The trick is to show the fault clearly while keeping any addresses, account numbers and other personal details out of shot.
When reporting a fault, take three types of shots. First, a close-up that shows the defect clearly. Second, a wider photo that puts the fault in context so someone else can see where it is. Third, a clear image of any serial numbers and receipts, with personal details obscured. Then secure the evidence trail by making backup copies, noting where you stored the files and who you shared them with. Following these steps will help reduce delays, strengthen your case and protect your privacy.

1. Take a close-up photo of the fault and its surroundings
When you need to photograph a fault, a few clear pictures will save time and confusion later. Follow these simple steps:
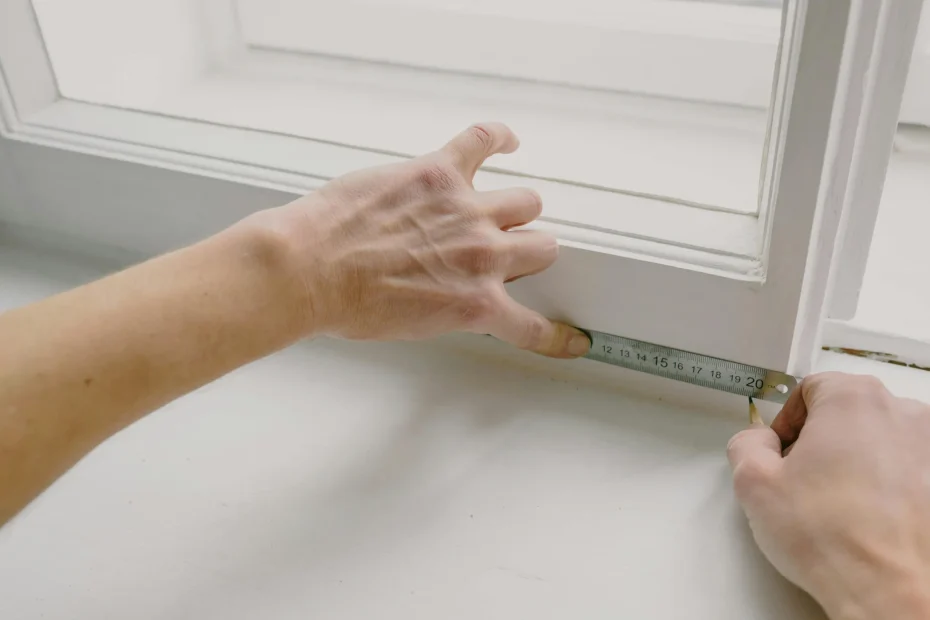
1. Close-up detail: Take a sharp close-up that highlights texture, edges and any separation between materials. Use a macro setting or crop in later, and angle the lens slightly to show depth. Place a neutral object such as a ruler or coin for scale, taking care not to cover any identifying marks.
2. Context shot: Then take a wider photo that shows where the fault sits in its surroundings. Include fixed features like a window, pipe run or skirting board so the position is obvious.
3. Protect privacy: Before you share images, crop or blur faces, number plates and any post or documents that could identify people or addresses.
4. Multiple angles and distances: Photograph from several viewpoints — an oblique angle to reveal depth, a perpendicular shot for measurements, and a long shot to show how the issue relates to nearby fixed features.
A few well-composed images make it much easier for someone to understand the problem and advise on the next steps.
If you need to photograph a room, item or incident to show its condition, a few simple steps will make your pictures clearer and safer to share.
Lighting and focus
– Use soft, natural light where possible and avoid a harsh flash that creates glare.
– Keep the camera steady to prevent blur; rest it on a stable surface or use a tripod.
– If parts of the scene hide in deep shadow or bright highlight, take bracketed exposures to capture more detail.
Protect privacy before sharing
– Keep the original files secure, and export separate copies for sharing with location data and other personal metadata removed.
– Remember that removing metadata does not stop identification from visible content. Consider blurring faces, cropping identifiable backgrounds, or redacting readable documents and other sensitive details before you share images.
Keep a clear record
– Name images to match any written notes and record the device and camera settings used for each photo to preserve their evidential value.
Taken together, these steps create a clear, reproducible visual record while reducing the risk of exposing people or household information unnecessarily.

2. Photograph serial numbers and receipts, hide personal details
If you need to keep proof of an item or its serial number, follow these simple steps. First, take a full-frame photo that shows where the serial number sits on the item, then take a close-up that captures every character clearly. Rest your camera on something stable and use side lighting to cut glare and shadows. Next, photograph the complete receipt or proof of purchase, then make a tight crop that clearly shows the retailer name, item description and transaction or order reference for sharing. Keep the full, unedited originals stored safely and use the cropped copies when you need to present evidence.
When you need to share documents or images, protect personal information first. Redact names, addresses and full payment numbers, but keep transaction references and the last few digits of the payment method so the payment can still be identified. Before you share files, remove identifying metadata and check the file properties to confirm it has gone. Keep an offline copy that retains the original metadata for your records. Give the shared copy a simple identifier, such as the filename or a checksum, so you can link it back to the original. Check any serial numbers against the receipt, order confirmation, warranty paperwork or registration screenshot. For each file add a short note saying what it proves and where it came from.

3. Protect your privacy and keep a clear evidence trail
Keep an untouched original photo and record a checksum or other verification so you can prove the file has not been altered. At the same time, make separate edited copies for sharing that remove or obscure personal details. Remove identifiers by cropping, blurring selective areas, or covering labels. If an identifier is genuinely needed for context, take a second shot of the same scene without house numbers, licence plates, or faces.
Store the original file with its metadata intact and save edited versions separately so you can compare them later if required. Include close-ups of the fault plus at least one wide-angle shot to show its relationship to the surroundings. For scale, use a neutral reference object such as a ruler or a plain card marked with your initials and case code.
These simple steps protect privacy while keeping a verifiable record you can rely on.
If you need to track files, keep a simple chain of custody. For each file, note the filename, what was done, who accessed it and why, and store that log with the master copy so contemporaneous records can support later checks.
Keep distribution tight: do not post files publicly, send edited copies only to the people who need them, and use encrypted or password-protected transfers to reduce the risk of accidental disclosure.
Maintain a recipient list and keep copies of any shared files so you can show where a file travelled without exposing private data. This gives you a clear, verifiable trail if you need to check what happened.
When you need to document a fault, clear photos make all the difference. Take sharp close-ups to show the fault itself and wider shots to show where it is, being careful to keep personal details out of view. Photograph serial numbers clearly, capture receipts with any relevant info cropped in, and keep the originals safe. Add a simple verification step so recipients can trust the files, for example by saving unedited copies and noting a basic checksum or the file name and size. Together, these steps create a verifiable trail others can check.
Follow three simple steps to document a problem so your evidence is clear and your personal details stay safe.
1. Photos: Take close-up pictures of the fault and include something for scale, such as a coin or ruler, so the size is obvious.
2. Records: Photograph serial numbers and receipts, but obscure or blur any personal information before sharing.
3. Files and sharing: Keep an untouched original file as your master and save edited versions with a short note of what you changed. Keep edited copies for sharing, store the originals offline with a basic custody log, and only share information with the people who need it to avoid delays and protect your privacy.
These simple steps make it easier to support a repair, refund or insurance claim while keeping your data secure.